
Hammock chairs provide a unique blend of comfort and charm, making them a favorite for relaxation both indoors and outdoors. However, finding the perfect spot to hang a hammock chair isn’t always feasible, which is where a standalone hammock chair stand comes into play. Building your own stand can be a rewarding project, offering you a customized frame that perfectly suits your space and needs. In this article, we’ll walk you through DIY Hammock Chair Stand: A Comprehensive Guide to Building Your Own, covering everything from materials and tools to step-by-step construction.

The Appeal of a DIY Hammock Chair Stand
Creating your own hammock chair stand not only saves money but also allows for personalization. Whether you want a rustic, natural wood finish or a sleek, modern design, a DIY project affords you the freedom to choose materials and finishes that complement your aesthetic. Moreover, the sense of accomplishment from building something with your own hands adds an extra layer of satisfaction.
Additionally, a DIY hammock chair stand offers the flexibility to tailor the dimensions to your specific needs. Commercial stands may not always fit perfectly in the desired location, but with a custom build, you can ensure your stand fits seamlessly into your chosen space. This customization also extends to ensuring the stand can support your weight and is designed for optimal comfort and stability.
Selecting the Right Materials
The first step in building your own hammock chair stand is selecting appropriate materials. The choice of materials will significantly impact the stand’s durability, appearance, and ease of construction. Common materials include hardwood, softwood, and metal.
Wood:
Wood is a popular choice due to its aesthetic appeal and relative ease of handling. For outdoor use, opt for weather-resistant woods like cedar, teak, or pressure-treated lumber. Indoor stands can use hardwoods like oak, maple, or birch. Ensure that the wood is free of cracks and knots that could compromise its strength.
Metal:
Metal stands offer a sleek, modern look and are incredibly durable. Common choices include galvanized or stainless steel pipes and aluminum. Metal stands require different tools and skills for cutting and welding, but they result in a robust and long-lasting structure.
Gathering the Necessary Tools
Once you’ve chosen your materials, you’ll need to gather the necessary tools for the construction process. Having the right tools on hand will make the project smoother and more efficient. Common tools include:
- Tape Measure: Ensures accurate measurements for cutting and assembling materials.
- Saw: A hand saw or electric saw (such as a miter saw or circular saw) for cutting wood or metal.
- Drill and Bits: Essential for creating holes for screws and bolts.
- Screwdriver or Power Driver: For fastening screws.
- Wrench Set: For tightening bolts and nuts.
- Sandpaper or Sander: For smoothing any rough edges on the wood.
- Level: Ensures the stand is balanced and stable.
- Safety Gear: Protective glasses, gloves, and ear protection to ensure safety throughout the project.
With materials and tools ready, you’re set to proceed with the actual construction phase.
Designing Your Hammock Chair Stand
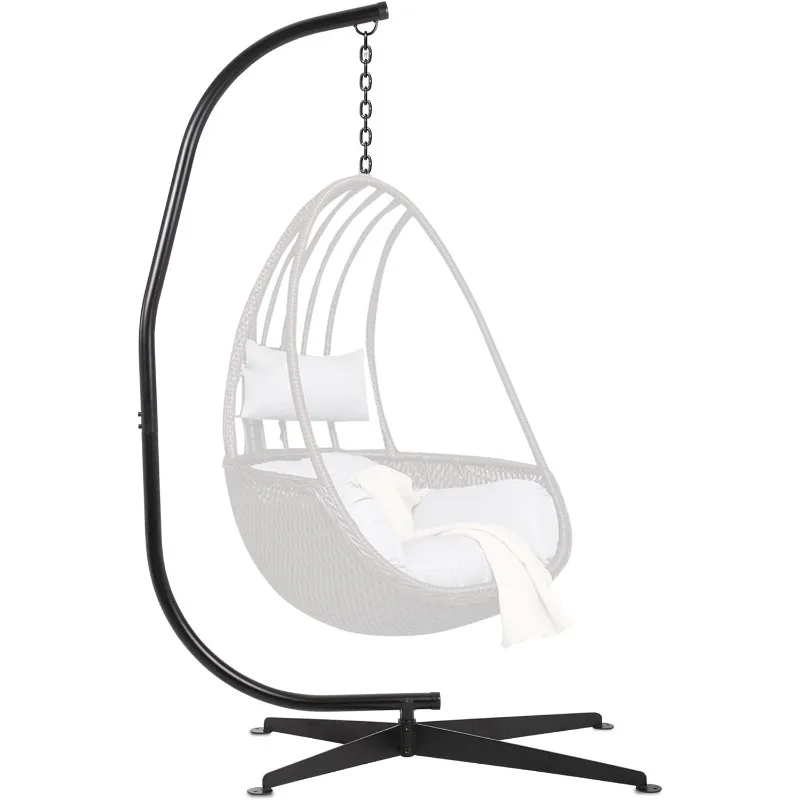
Design is a critical aspect of this project. A well-thought-out design makes the construction process easier and the final product more functional and aesthetically pleasing. There are several designs to choose from, such as the classic A-frame, the more intricate arching frame, or a simple tripod structure.
A-Frame Design:
The A-frame is one of the simplest and most stable designs, suitable for both indoor and outdoor use. This design involves two vertical supports connected at the top with a crossbeam. The hammock chair hangs from the crossbeam, distributing weight evenly.
Arching Frame:
An arching frame provides a more elegant, flowing look. This design often requires bending wood or metal into a curved shape, which can be more challenging but offers a visually striking appearance.
Key Considerations:
- Height and Width: Ensure the stand is tall and wide enough to accommodate the hammock chair without it touching the ground.
- Weight Capacity: The stand should support at least 300 pounds to ensure safety and durability.
- Base Stability: The base should be wide enough to prevent tipping, with additional supports if needed for added stability.
Create detailed sketches or use design software to visualize the final stand before beginning the construction process. This preparation minimizes errors and ensures all parts fit together seamlessly.
Step-by-Step Construction Guide
With your design finalized, it’s time to start building. Here’s a step-by-step guide to constructing a basic A-frame hammock chair stand.
Step 1: Cutting the Wood
Measure and cut the wooden beams according to your design. For an A-frame stand, you’ll typically need two long vertical beams, one crossbeam, and several shorter support beams. Ensure all cuts are clean and accurate.
Step 2: Sanding the Edges
Sand the edges of the cut wood to smooth out any splinters or rough spots. This step is crucial for both safety and aesthetics. A smoother surface also takes finishes better if you plan to stain or paint the wood.
Step 3: Drilling Holes
Drill holes for the bolts at the top ends of the vertical beams where they’ll connect to the crossbeam. Additional holes may be needed for any lower supports or braces, depending on your design. Ensure the holes are aligned correctly to facilitate easy assembly.
Step 4: Assembling the Frame
Connect the vertical beams to the crossbeam using bolts and washers. Tighten them securely but avoid over-tightening, which can crack the wood. Attach any additional supports or braces to enhance stability. Use a level to ensure everything is aligned properly during assembly.
Step 5: Attaching the Base Supports
Attach the base supports to the bottom of the vertical beams. These supports help distribute weight and prevent tipping. Secure them with screws or bolts, ensuring they are flush with the ground.
Step 6: Finishing Touches
Apply a wood finish, stain, or paint to protect the wood from moisture and UV damage. This step is especially important for outdoor stands. Allow the finish to dry completely before proceeding.

Safety First: Ensuring Stability and Durability
Safety is paramount when building a hammock chair stand. Here are some key considerations to ensure your stand is both stable and durable:
Weight Capacity:
Ensure the stand can support at least 300 pounds. Use high-quality materials and hardware to avoid any risk of collapse or tipping.
Anchoring:
For outdoor stands, consider anchoring the base to the ground with stakes or concrete footings to prevent shifting or tipping in strong winds.
Regular Inspection:
Periodically inspect the stand for signs of wear or damage, such as cracked wood, loose bolts, or rusted metal. Regular maintenance will extend the lifespan of your stand and keep it safe for use.
Adding Personal Touches: Customization and Decoration
One of the joys of building your own hammock chair stand is the ability to customize it to your liking. Here are some ideas to add personal touches to your stand:
Paint and Stain:
Customize the color of your stand by painting or staining it. Choose colors that complement your outdoor or indoor decor. Weather-resistant paint is ideal for outdoor stands to protect against the elements.
Decorative Elements:
Add decorative elements such as carvings, decals, or even LED lights to give your stand a unique appearance. Be creative and let your personality shine through your design choices.
Upholstery and Cushions:
Enhance comfort by adding upholstered cushions or hanging accessories like pillows and throws. Choose weather-resistant fabrics for outdoor use to ensure they withstand the elements.
Maintenance Tips for Longevity
To maximize the lifespan of your DIY hammock chair stand, regular maintenance is essential. Here are some tips to keep your stand in top condition:
Clean Regularly:
Wipe down the stand to remove dirt, dust, and debris. For metal stands, consider using a mild soap and water solution to prevent buildup. Allow the stand to dry completely after cleaning.
Seal and Protect:
Reapply a wood sealant, stain, or paint as needed to protect the stand from moisture and UV damage. Inspect the finish regularly for signs of wear and reapply as necessary.
Check Hardware:
Regularly inspect the hardware for rust or wear. Tighten any loose bolts and replace any damaged or corroded parts to maintain the stand’s stability and safety.
Conclusion: Enjoying Your Handcrafted Hammock Chair Stand
Building your own hammock chair stand is a rewarding project that combines creativity, craftsmanship, and functionality. By following this comprehensive guide, you can create a unique and sturdy stand that enhances your relaxation space, whether indoors or outdoors. From selecting materials to adding personal touches, every step of the process offers an opportunity to express your style and enjoy the satisfaction of a job well done.
The final product is not just a piece of furniture; it’s a testament to your skills and creativity. So grab your tools, get started on your DIY hammock chair stand, and look forward to many blissful moments of relaxation in your handcrafted haven.