
Introduction to DIY Homemade Hammocks
Creating a DIY homemade hammock is a fulfilling project that combines creativity with functionality. Not only does it provide a unique touch to your backyard, but it also offers a cozy spot to relax and unwind. Whether you’re a seasoned DIY enthusiast or a beginner looking to tackle a new project, making your own hammock can be both enjoyable and rewarding. In this guide, we’ll explore the steps to create a hammock from scratch, ensuring that you have all the knowledge needed to build a comfortable and durable backyard retreat.
Choosing the Right Materials
Selecting the Fabric
The first step in crafting a homemade hammocks is choosing the right fabric. The material you select will significantly impact the comfort, durability, and overall look of your hammock. Common choices include canvas, polyester, and cotton. Canvas is known for its durability and strength, making it an excellent option for long-term use. Polyester offers resistance to weather elements and is easy to clean, while cotton provides a soft, comfortable feel but may require more maintenance.
Considering the Hammock Size
The size of your hammocks will depend on the space you have available and your personal preferences. Standard hammocks are usually around 4 to 5 feet wide and 6 to 8 feet long, but you can adjust these dimensions based on your needs. Larger hammocks can accommodate more than one person and provide extra lounging space, while smaller ones are ideal for more compact areas.
Designing Your Hammock
Creating a Design Blueprint
Before you start assembling your hammock, it’s crucial to design a blueprint. This involves sketching out the dimensions and the overall shape of your hammock. You can use online design tools or simply draw it out on paper. A well-thought-out design will help you visualize the final product and guide you through the building process. Make sure to include measurements for the fabric pieces, ropes, and any additional features you plan to add.
Adding Personal Touches
One of the advantages of making a DIY hammock is the ability to add personal touches. You can choose fabrics in your favorite colors or patterns, and add decorative elements like fringes or tassels. Additionally, you might want to incorporate extra features such as built-in pillows or adjustable straps for added comfort and convenience.
Gathering Tools and Supplies
Essential Tools
To build your hammock, you’ll need a few essential tools. These include a sewing machine (if you’re sewing the hammock yourself), scissors, measuring tape, and pins. If you’re planning to use wooden or metal frames, you’ll also need tools like a drill, saw, and screws. Make sure you have everything you need before starting the project to avoid interruptions.
Sourcing Supplies
Besides the fabric, you will need several other supplies such as strong rope or webbing, hammock hardware (like O-rings or S-hooks), and a sturdy frame if you’re not hanging the hammock between trees. You can find these supplies at hardware stores, fabric shops, or online. Be sure to choose high-quality materials to ensure the longevity and safety of your hammock.
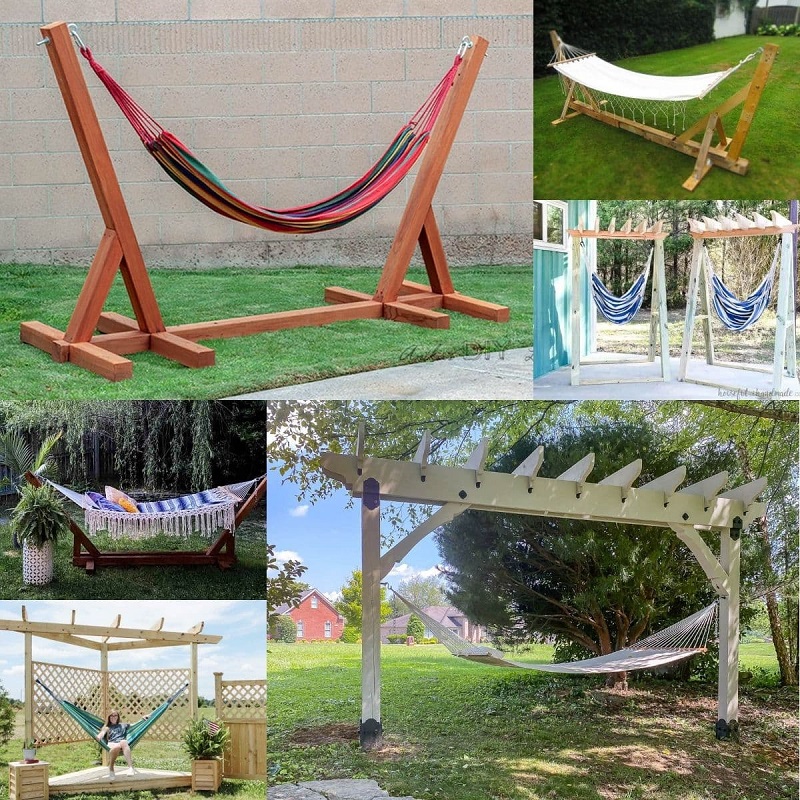
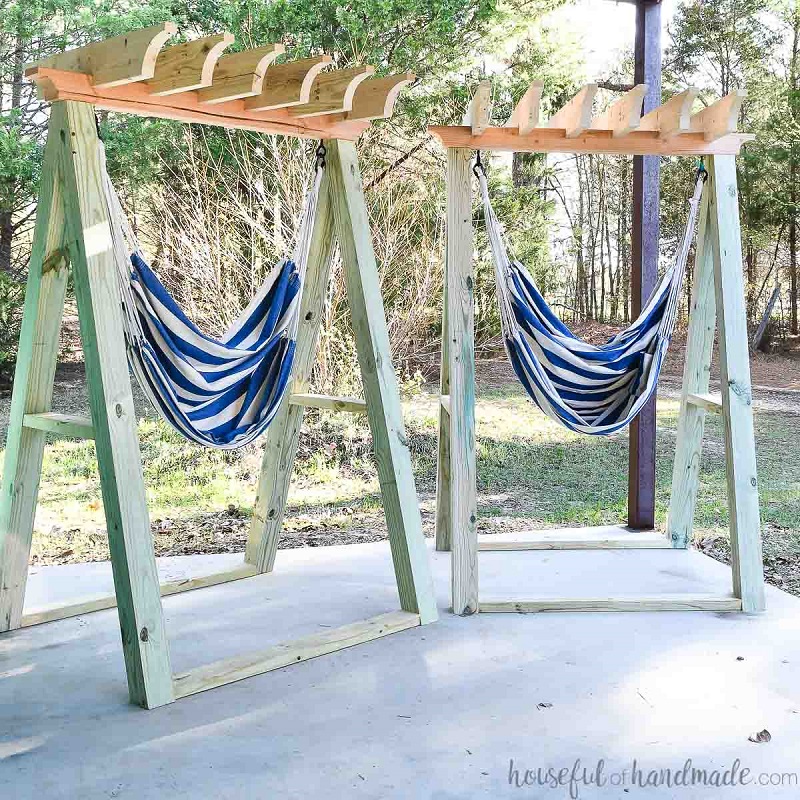
Building the Hammock Frame
Constructing a Wooden Frame
If you prefer a freestanding hammock, you can build a wooden frame. This involves measuring and cutting the wood to create a sturdy structure that can support the weight of the hammock and its users. Typically, you’ll need two long pieces for the sides and two shorter pieces for the ends. Assemble the frame using screws or nails and reinforce the joints with brackets for added stability.
Assembling a Metal Frame
For a metal frame, you’ll need to cut metal pipes or tubes to the appropriate lengths and assemble them using connectors or welding. Metal frames are often more durable and can support heavier weights compared to wooden frames. Ensure that the frame is securely assembled and properly balanced before attaching the hammock.
Sewing the Hammock Fabric
Measuring and Cutting the Fabric
Once you have your design and materials ready, it’s time to cut the fabric. Measure the dimensions according to your design blueprint and mark the fabric with a fabric marker or chalk. Use sharp scissors to cut the fabric accurately. It’s a good idea to leave a little extra fabric for hems and seams.
Sewing the Seams
With the fabric cut, you can start sewing the seams. Fold the edges of the fabric and pin them in place to create hems. Use a sewing machine to stitch along the edges, making sure to use a strong, durable thread. Reinforce the seams at the ends and corners to prevent fraying and ensure the hammock can withstand regular use.
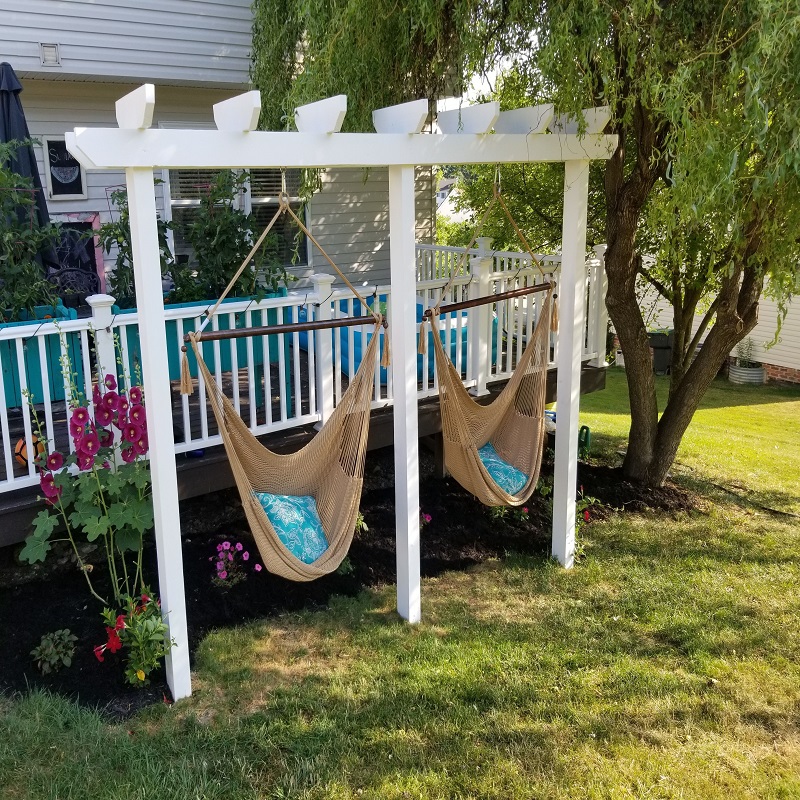
Attaching the Hammock to the Frame
Securing the Hammock to a Wooden Frame
To attach your hammock to a wooden frame, you’ll need to use strong ropes or straps. Attach the ropes to the ends of the hammock, making sure they are securely tied or fastened. Then, connect the other ends of the ropes to the frame using hooks or knots. Test the hammock to ensure it’s properly balanced and securely attached.
Installing the Hammock on a Metal Frame
For a metal frame, you can use metal hardware like S-hooks or carabiners to attach the hammock. Ensure that the hardware is rated for the weight it will support and that it’s properly installed. Check the stability of the hammock by gently testing it before use.
Adding Finishing Touches
Decorating the Hammock
Once your hammock is assembled and attached, you can add decorative elements to enhance its appearance. Consider adding cushions, throws, or decorative pillows to make the hammock more inviting and comfortable. You might also want to incorporate outdoor-safe lighting or curtains to create a cozy atmosphere.
Ensuring Safety and Comfort
Before using your hammock, double-check all the connections and ensure that everything is securely fastened. Test the hammock by applying gradual weight to make sure it can support its intended load. Regularly inspect the hammock for any signs of wear or damage and address any issues promptly to maintain safety and comfort.
Enjoying Your Homemade Hammock
Setting Up the Perfect Spot
Choose a relaxing spot in your backyard for your hammock. Ideally, it should be placed in a shaded area to protect against harsh sunlight. Consider adding some landscaping elements like potted plants or a small table to enhance the ambiance of your relaxation area.
Relaxing and Unwinding
With your hammock set up and ready, take the time to enjoy your creation. Whether you’re reading a book, taking a nap, or simply enjoying the outdoors, your DIY hammock provides a perfect retreat for relaxation. Regularly maintain and clean your hammock to keep it in great condition and continue enjoying your backyard oasis for years to come.
Maintaining Your Hammock
Cleaning and Care
To keep your hammock in good condition, regular cleaning is essential. For fabric hammocks, follow the manufacturer’s instructions for washing. Typically, you can use mild soap and water, either by hand washing or machine washing if the fabric allows. Allow the hammock to air dry completely before storing it. For wooden or metal frames, wipe down with a damp cloth and check for any rust or damage regularly.
Storage Tips
When not in use, especially during adverse weather conditions, store diy your hammock in a dry, sheltered area to prolong its lifespan. If you have a removable hammock, fold it neatly and store it in a protective cover or bag. For hammocks attached to a frame, consider using a cover or tarp to shield it from the elements.
Conclusion
Building a DIY homemade hammock is a rewarding project that allows you to create a personalized and comfortable space in your backyard. From selecting the right materials and designing the hammock to assembling the frame and adding finishing touches, each step is an opportunity to customize your hammock to suit your preferences. With a little effort and creativity, you can craft a beautiful and functional retreat that enhances your outdoor living experience. Enjoy your new hammock and the relaxation it brings!