Hanging a porch swing can transform your outdoor space into a cozy retreat. However, ensuring it is securely and safely installed is paramount for your comfort and safety. This comprehensive guide will walk you through the steps to hang a porch swing securely, including the materials you’ll need, preparation steps, installation tips, and maintenance considerations.
Understanding the Types of Porch Swings
Choosing the Right Swing for Your Space
Before you can hang a porch swing, it’s essential to understand the different types available. Porch swings come in various styles, materials, and sizes, each designed for specific uses and aesthetics. Common materials include wood, metal, and plastic. Wooden swings are often favored for their classic look and comfort, while metal swings provide durability and a modern touch. Additionally, swings can range from simple bench-style designs to more intricate versions with cushions and canopies.
When choosing a swing, consider the space where it will be hung. Measure the area to ensure you select a swing that fits comfortably without crowding your porch or yard. Additionally, check the swing’s weight limit to ensure it can accommodate the number of users and any additional load, such as cushions or blankets.
Assessing Your Needs and Preferences
Think about how you plan to use the swing. If it’s primarily for relaxation, a cushioned swing may be the best option. If you want a space for social gatherings, consider a larger swing that can seat multiple people. Your personal style will also play a significant role in your choice. Whether you prefer a rustic wooden swing or a sleek metal design, your choice should complement your home’s exterior and your personal taste.
Gathering Necessary Tools and Materials
Essential Tools for Installation
Once you’ve chosen the perfect porch swing, the next step is to gather the tools required for installation. You will need a stud finder, a drill, a level, and a tape measure. A stud finder is crucial for identifying the best location to secure your swing, as it helps locate the support beams in your porch ceiling. A drill will be necessary for creating pilot holes and securing the swing to the ceiling or beams. A level ensures that your swing hangs evenly, preventing an unbalanced or awkward seating experience.
Additionally, a wrench or socket set may be required if your swing has hardware that needs tightening. If you’re planning to hang your swing from a tree or an overhead beam, ensure you have sturdy eye bolts and heavy-duty chain or rope. Using the right tools will make the installation process more straightforward and increase the longevity of your swing.
Required Materials
In terms of materials, you will need the swing itself, which may come with some hardware, but be prepared to purchase additional items such as eye bolts, heavy-duty chains or ropes, and protective coatings. The eye bolts should be rated for at least 300 pounds to ensure safety, and the chain or rope should also be heavy-duty to support the weight of the swing and its occupants.
If you are hanging the swing from a tree, ensure that the branch is healthy and robust enough to support the swing’s weight. Additionally, consider purchasing protective coatings for wooden swings to extend their lifespan against weather elements. Using high-quality materials is vital for a secure installation and long-term enjoyment of your porch swing.
Preparing the Installation Area
Selecting the Perfect Location
The next step in hanging your porch swing securely is choosing the ideal location. Look for a spot that offers comfort and convenience, away from heavy foot traffic and potential hazards. Ensure there is enough overhead space for the swing to move freely without hitting ceilings, walls, or other obstacles. Consider the view from the swing as well; placing it where you can enjoy the scenery can enhance your outdoor experience.
If you’re hanging the swing under a porch, ensure the ceiling height is sufficient to accommodate the swing’s full motion. A good rule of thumb is to have at least 3 feet of clearance above the swing. Additionally, think about how the swing will fit into your overall outdoor space. Position it to maximize comfort and accessibility while also considering aesthetic appeal.
Preparing the Structure
Before hanging the swing, it’s crucial to inspect the structure you will be using. If you are installing it on a porch, examine the beams or ceiling for any signs of rot, damage, or weakness. If you find any compromised areas, you may need to reinforce them before proceeding.
For swings hung from trees, select a branch that is at least 8 inches in diameter and appears healthy. Avoid branches that show signs of decay or disease. If necessary, consult with a professional to ensure the branch can support the swing safely. Proper preparation of the installation area will not only enhance safety but also improve the swing’s functionality.

Measuring and Marking the Installation Points
Accurate Measurements
With your location chosen and the structure inspected, it’s time to measure and mark the installation points. Use a tape measure to determine the appropriate height for hanging the swing. A typical hanging height is between 18 to 24 inches off the ground, but this may vary based on personal preference and the type of swing.
After deciding on the height, measure the distance between the two points where the swing will be hung. Ensure that the distance matches the width of the swing. If the swing is too wide for the installation space, it can cause the swing to hang unevenly or restrict movement.
Marking the Drill Points
Once you have your measurements, use a pencil to mark the drill points on the ceiling or overhead beams. Double-check your markings to ensure accuracy. This step is crucial, as improper placement can lead to an unstable swing. Additionally, using a level, confirm that both points are at the same height to ensure an even hang. Accurate measurements and markings will significantly contribute to the swing’s stability and your overall enjoyment.
Installing the Hardware
Drilling the Pilot Holes
Now that your measurements are marked, it’s time to drill the pilot holes. Using a drill bit that matches the size of your eye bolts, drill into the marked points carefully. If you encounter any resistance, stop and reassess to ensure you are drilling into a solid part of the structure.
Pilot holes are essential as they guide the eye bolts and prevent splitting the wood. Be sure to drill deep enough to accommodate the entire length of the eye bolts. This step is crucial in providing a secure hold for the swing, preventing any accidents once it’s installed.
Securing the Eye Bolts
After drilling the pilot holes, insert the eye bolts into the holes. Use a washer for each bolt to distribute the load and provide added stability. Tighten the nuts securely using a wrench, ensuring that the bolts are firmly anchored to the structure. It’s essential that the eye bolts are installed at the correct angle, typically vertically, to maximize strength and stability.
If you’re hanging the swing from a tree, follow a similar procedure by drilling into the chosen branch and inserting the eye bolts. Always ensure the bolts are rated for outdoor use to withstand weather elements. Properly securing the eye bolts is critical in providing a safe and stable hanging point for your porch swing.
Hanging the Swing
Attaching the Swing
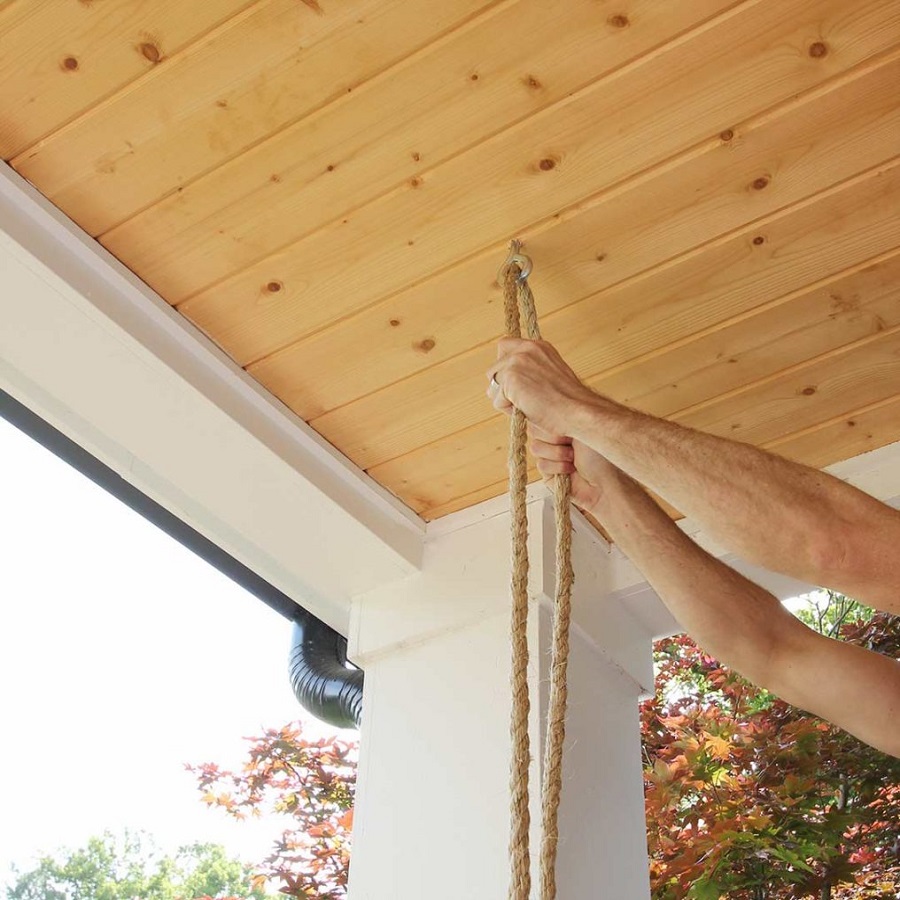
With the eye bolts securely in place, it’s time to attach the swing. Depending on the design of your swing, you will either use chains or ropes. If you are using chains, hook them onto the eye bolts and adjust their length to ensure the swing hangs evenly. The chains should be of equal length on both sides to allow for a balanced swing motion.
If using ropes, thread them through the eye bolts and tie secure knots to prevent slipping. Ensure that the knots are strong and can withstand the weight of the swing and its users. After attaching the swing, step back and visually inspect the setup to ensure everything appears level and secure.
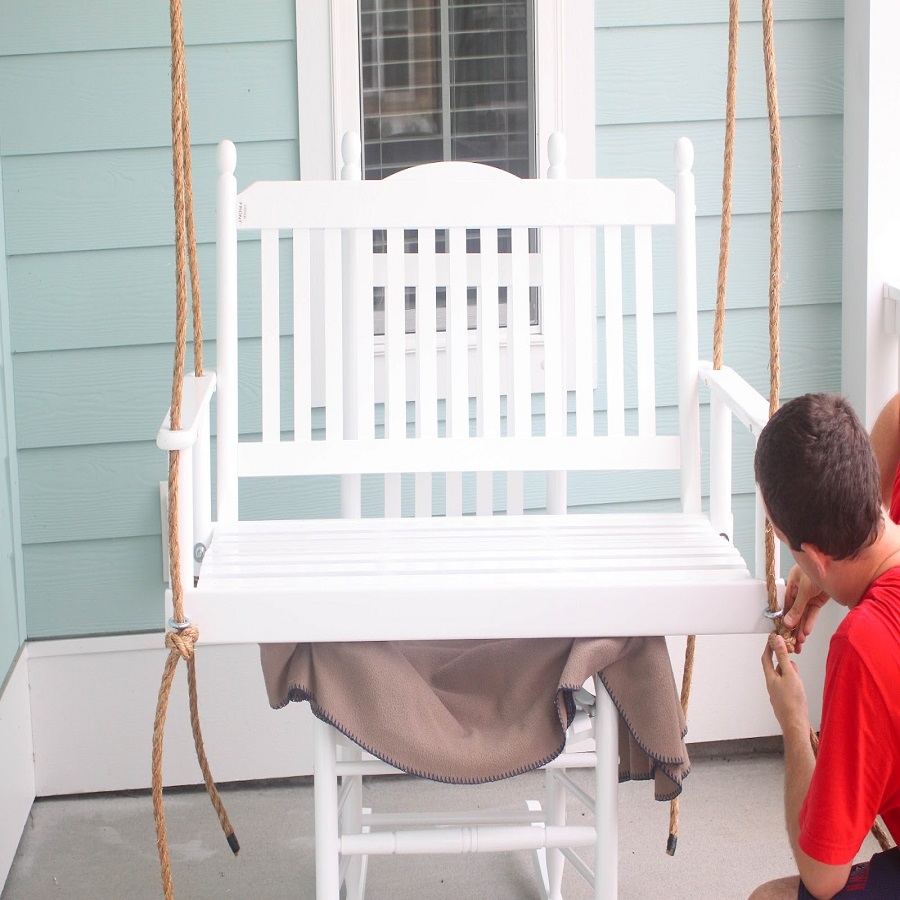
Adjusting for Comfort
Once the swing is hung, test it by sitting on it gently. Ensure it feels stable and secure. You may need to make adjustments to the height or length of the chains or ropes to achieve the desired swing height and comfort level. The ideal height allows users to easily get in and out of the swing while ensuring a comfortable seating position.
If necessary, make further adjustments until the swing is perfectly positioned. This step is vital for maximizing comfort and safety, ensuring that the swing is not too high or low for users.

Safety Considerations
Regular Inspections
After successfully hanging your porch swing, it’s crucial to prioritize safety through regular inspections. Periodically check the eye bolts, chains, or ropes for any signs of wear or damage. Look for frayed edges in ropes, rust in chains, or loose bolts. Address any issues immediately to prevent accidents. Regular inspections ensure that your swing remains safe for use over time.
Additionally, check the structure supporting the swing. If you notice any changes in the integrity of the ceiling or beams, consult a professional before using the swing again. Keeping an eye on your swing and its surroundings is essential for long-term safety.
Weight Limit Awareness
Understanding the weight limit of your swing is also crucial. Always adhere to the manufacturer’s recommendations regarding the maximum load. Avoid overloading the swing, as this can compromise its structural integrity and lead to accidents. Inform users of the swing’s weight limit to ensure safety for everyone enjoying the swing.
Consider installing a weight limit sign near the swing for added awareness. This practice will help prevent overloading and keep everyone safe while using the swing. Safety should always be a priority when enjoying your porch swing.